Users
Users
Adding Users:
There are several ways to define users in the B2Win Suite. Active Directory, Import Users or manually create them.
Add/Edit User
To view all the list of users in the system, in the left side bar click on Users and the list view for all users will be opened.
There you can see all the users in the system listed in the table with their profile image and few details in the table.
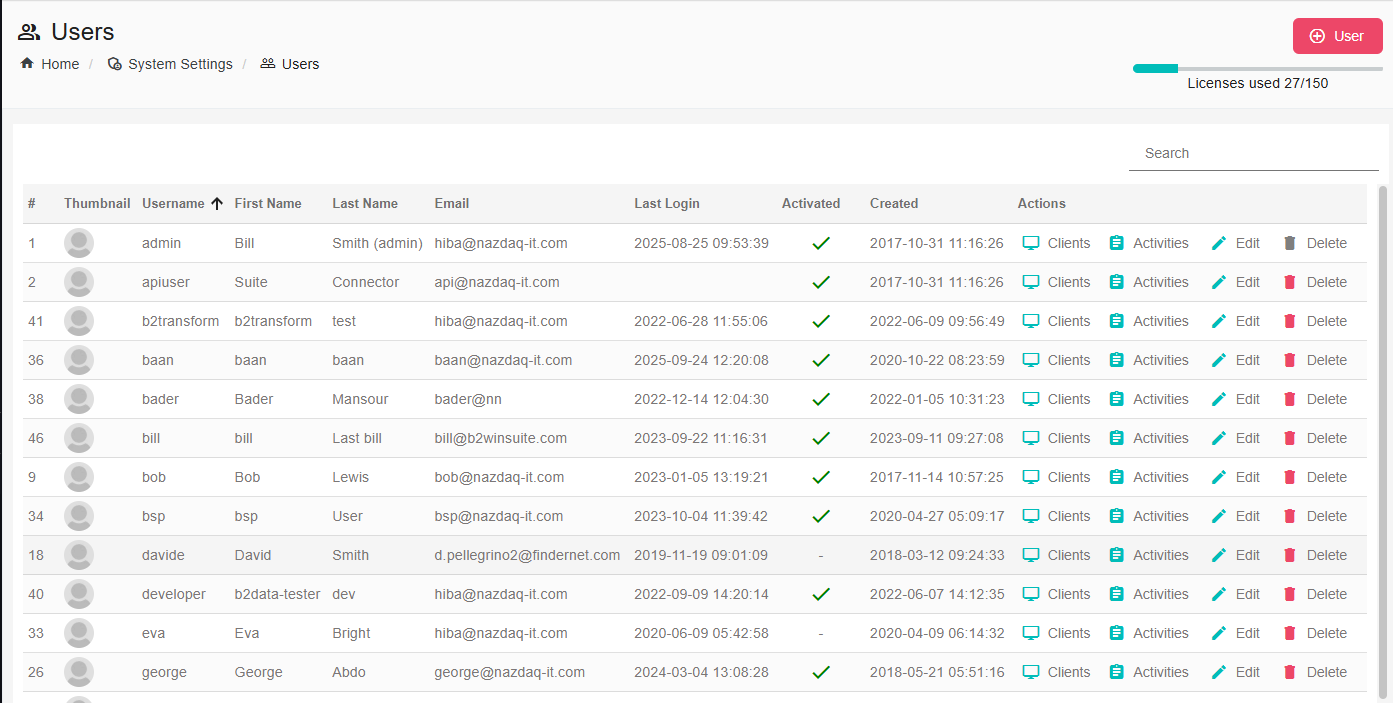
You can add a new user by clicking on the button Add User in the top - right of the list view page, or from the left side bar menu Add User
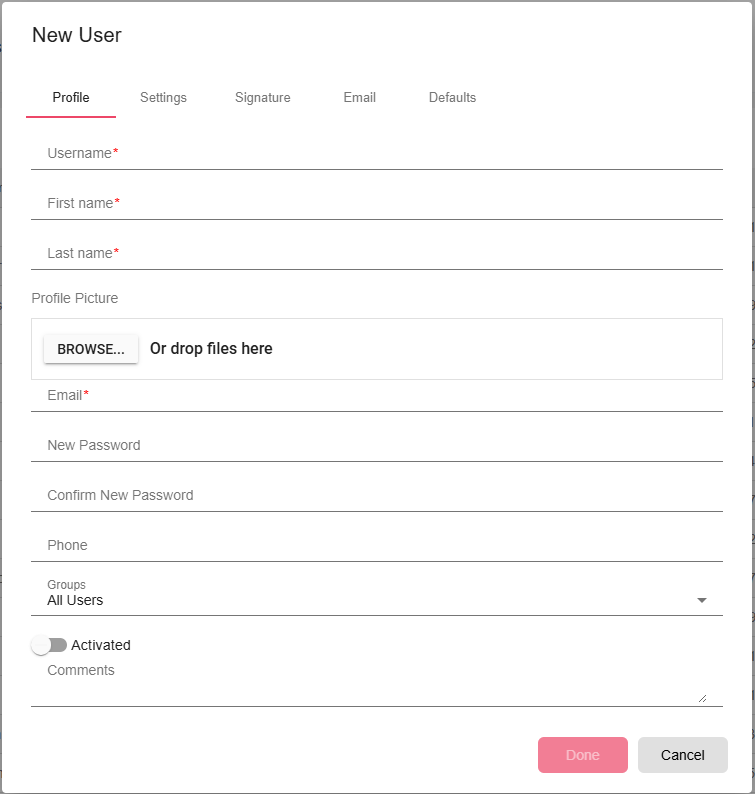
In the Add New User page you will only be able to add the profile detail, then after you create the user you can edit the settings for this user.
To Edit a user, from the Users list view click on edit on the user row you wish to edit, and then you will be redirected
Auto Create User
When you are working from an ERP System as the Input server, you can turn this switch On in the System -> Global Settings, and then B2Win Suite system will automatically create the user that is running B2Win if it doesn’t already exist in the system, so that the user can work with the same user name in the ERP and B2Win Suite without the need to login in both systems, the device will redirect you to be logged in Web interface.
Active Directory
Active Directory (AD) is a directory service that Microsoft developed for Windows domain networks. It is included in most Windows Server operating systems as a set of processes and services. Initially, Active Directory was only in charge of centralized domain management.
To connect to the active directory go to application.conf and enable it, you can do that by
Checking:
ldap.enabled = "true"
You can also enable a fallback option when the user does not exist in LDAP to look for it in B2Win Suit by checking:
ldap.fallback = "true"
There is also the option to auto create a user if he does not exist already, by enabling autocreate and setting the configuration. Example:
# Auto create the user if he doesn't exists already
ldap.autocreate = "true"
ldap.url = "ldap://nazit.nazdaq-it.com"
ldap.domain = "NAZIT"
ldap.authtype = "simple"
ldap.query = "CN=Users,DC=nazit,DC=nazdaq-it,DC=com"
User Groups
You can add the user to a group that can be used for permissions (Read more on Access Control Lists section 10.5), Currently in a fresh installation of B2Win Suite you will have multiple already defined groups and the admin user belongs to each one of them.
To view all the groups in the system, go to: Users -> User Group, and you can see the list there
Create User Group
You can create a new group, go to the section under Tools -> Users -> User Groups, at the top right click on Create Group at the new screen that was opened, insert a group name and then add users from the left panel to the right panel.
Read more about adding groups to the ‘Access Control List’ of each object.
Administrators
When you add a user to administrators group he can perform nearly everything in the system
All Users
This group contains all system users
B2Data - Developers
A developer is the user that can create B2Data Reports and use B2Data Builder to create new reports, and deploy reports to move them from the Development environment to Production. The number of users in this group is limited to the number of developers licenses you have in the system.
B2Data - Managers
A group of users who can manage the workflow. That is they can run/stop/reset and check each iteration status/log and each node input/output/properties. Also manage the workflow triggers.
Managers will also be the ones to edit the main menu B2Data Reports and arrange reports in different folders according to their content.
B2Data Reports - Print
This group will have access to all B2Data Reports to print only with the ability to change their own defaults in InputForm and Apps defaults.
B2Output - Base
When printing from an InputServer or any device to B2Win Suite the automatically created user will be added to this group, and he can perform basic printing actions on the report from all input servers available in the suite.
B2Output - SmartEngine – Moderators
A group of users who can moderate SmartEngine reports, including defaults distribution and splitting of reports
B2Output - SmartEngine - Run Only
This group can only use (Run) Smart Engine reports without the ability to edit them or change any configuration that affects all the other users. (For example, the defaults)
User Profile
A user can check or update his user profile and settings by going to the profile tab in the left sidebar.
A super user with the permission to update users can change any user by going to the Users tab in the left sidebar, and edit the user he chooses.
Edit Profile
Here you can find the basic profile information for this user, the login information and the user groups..
Settings
Note that an administrator has the option to deny users the permission to edit the settings in their profile by using the Access Control List described in Section 10.#### Thousand Separator {#thousand-separator}
When converting to Excel, B2Win Suite system will need the Input thousand separator which is used in the report data that is coming from the ERP system.
Also it will need the Output thousand separator which is the one used on your local machine, and will be used in the output file generated by B2Win Suite conversion.
Note that when these fields are empty in your profile, B2Win Suite will use the Input/Output thousand separator set in the System -> Settings.
Date Order
When converting to Excel, B2Win Suite system will need the Date Order of the date as it comes from your ERP system.

Signature
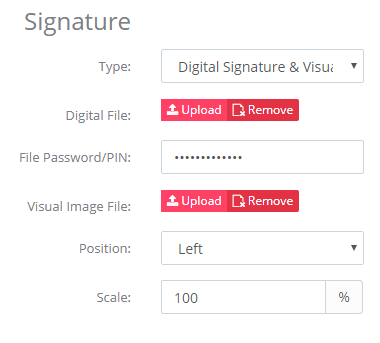
Here you can choose the signature type from these options.

Regular Image Only: You should set the image, the positions and the size for your signature and the scaling.

Digital: You need to upload your p12 digital signature file and save its password in your profile.

Digital Signature & Visual: In this case you need to set the digital signature and the image details for your signature to get both of them on your documents.
E-Mail Settings
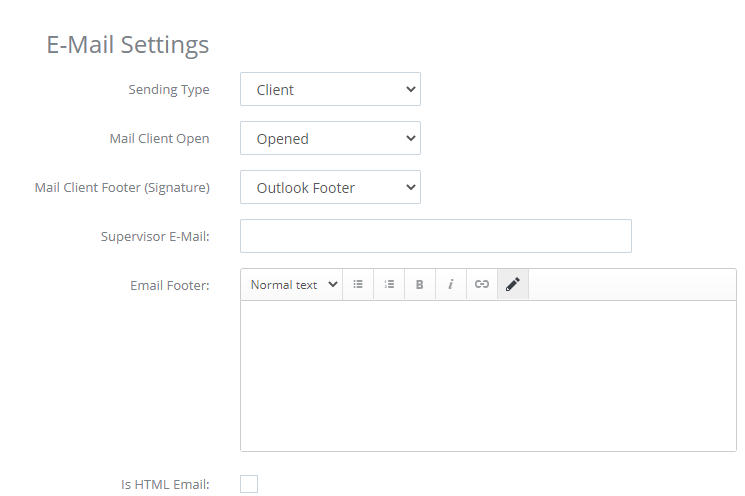
In the email settings, you can define the sending type, it can either be the default and then it will be taken from the system settings. Or the user can specify his specific sending type if it’s different from the system. It can be either SMTP or Client. When SMTP is chosen the SMTP settings will be visible beneath the E-Mail settings in this page for the user to fill his own settings. And when he chooses Client then the user should have the B2Win Suite Client installed and connected when sending emails.
You can also set the supervisor email that will be used when you check “Mail Boss” in the send dialog in B2Win.
Also you can edit the footer to be added to your email messages. You can choose it to be html or just a simple text.
In case the user footer is empty, the company footer will be used.
If you choose to send emails through your mail client and you would like to use the footer defined in your mail client application then you should set the Mail Client Footer.
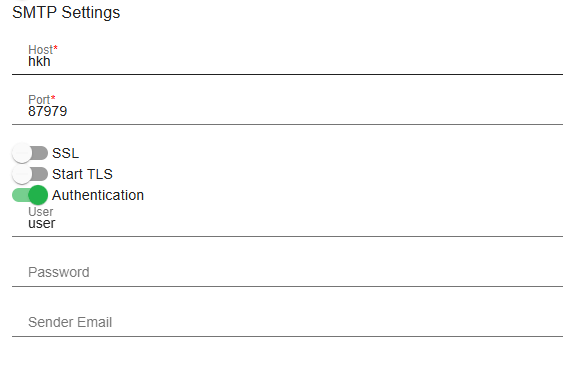
SMTP Settings
When the sending type is set to SMTP then in order to be able to send an email from your personal email, you should set the SMTP settings for your email, ask your system administrator if you do not know your SMTP settings.
Developer API
(Part of installation process)
Defaults
Preferences
Default Printer
This is the default printer that should be chosen by default when you choose the print action.
Default Address Book
The user’s default address book which will be used with Smart-Engine when the address book is set to ‘User-Default’.
Default Home Page
The default home page which will be opened when the user logs in B2Win Suite
Clients
You can connect your local client to B2Win Suite and get the benefits of using your desktop applications and permissions (More in Chapter 3.5)
In clients tab you can see all the clients that are connected or once been connected to that user, and in each client you can:
-
Update its settings
-
See the online status Offline/Online
-
See all printers
-
Get local Log (Only admin can do this)
-
Update the client manually
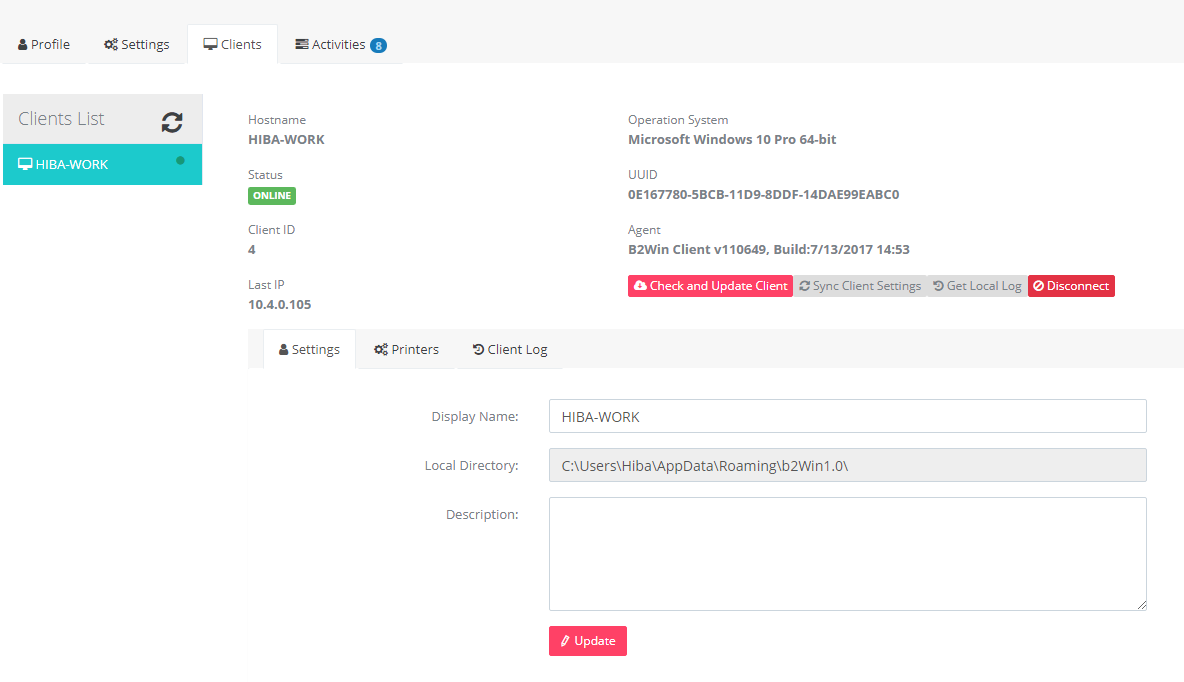
Update Client
Click on “Check and Update Client” button to receive the latest version of B2Win Suite Desktop Client (the client must be connected)
Sync Client Settings
When syncing the client, you also sync the latest changes such as printer and other details, the client syncs automatically every time it is disconnected and connected again, or you can click the button “Sync Client Settings”.
- Client Settings
You can edit the display name of the client Name that is displayed. You can also check where the local directory path is, and write a description if needed.
Printers
Under the printers’ tab, you will be able to see the printers that were detected by the client and which one is set to be your default
Activities
Each activity the user has performed is saved in the system under this user, so you can view all the activities that were done by him, to view activities go to activities tab.