Data Prep
Introduction
This manual describes the node DataPrep listed in the B2Data builder. This node helps the developer prepare, edit and organize the data. In the following manual, we will discuss the actions you can perform on the data in this node and how you can fix, rearrange and edit it to get the table result you need.
Here you can prepare a table output by selecting the columns you wish to add to the output. You can split some columns, remove part of it, create new custom columns based on existing ones using the enabled functions.
How to use this guide
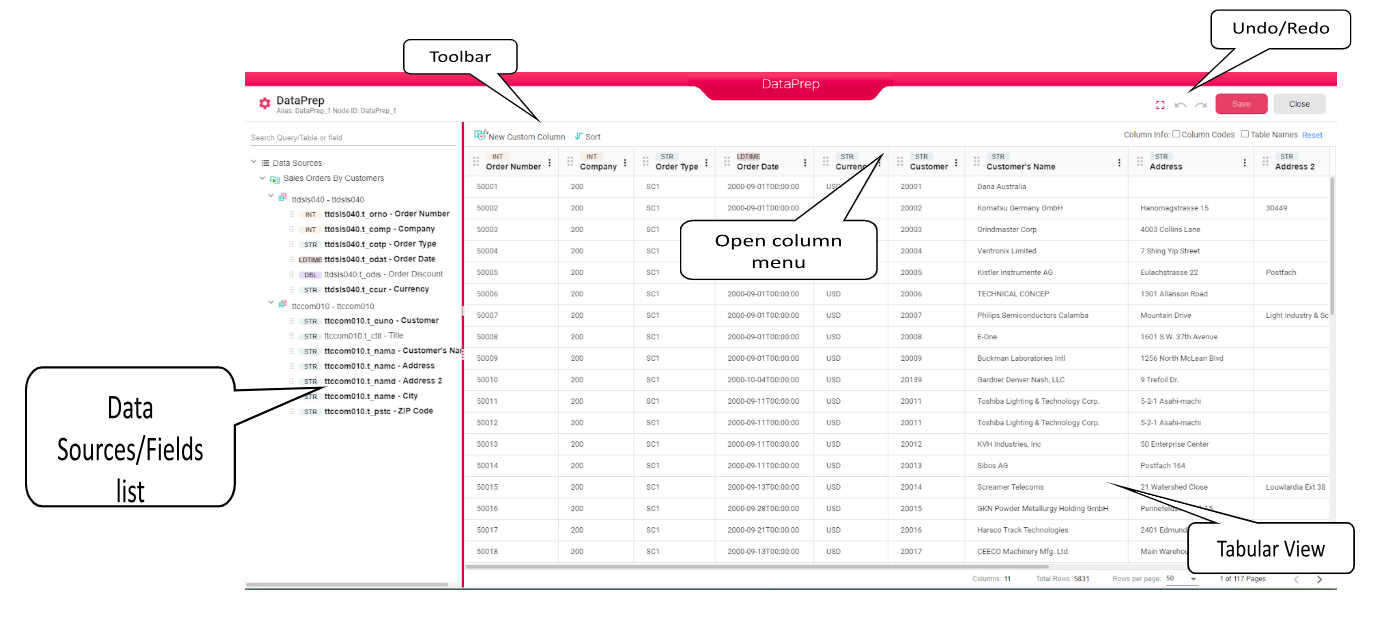
DataPrep contains two parts, the one on the left is a tree view that contains all source fields that can be dragged to the table grid, and the other part is the tabular grid layout.
In the following chapters we will describe how to start working on an empty DataPrep, add columns to it and customize the columns.
DataPrep
Create a new tabular layout
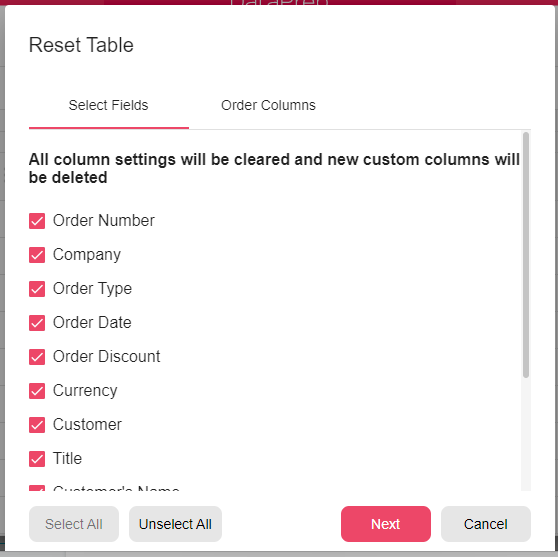
When you open a new empty DataPrep node you will get the following window to select the fields you would like to be added to the new design

After you have selected the fields to be included in your table, click next to set their order that you want to have in your tabular design.
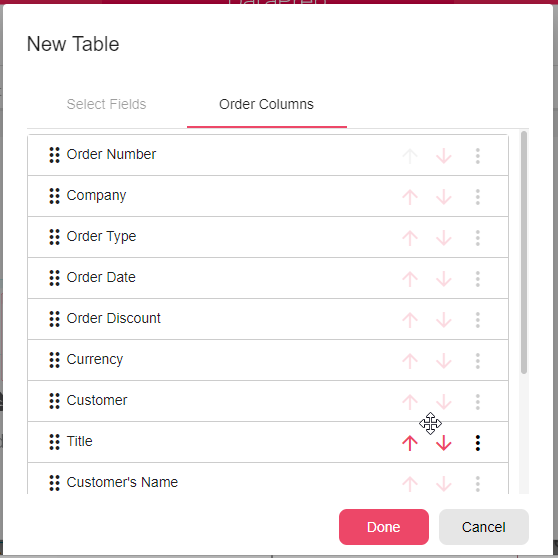
You can change the order by dragging each header up or down and drop it in the right position. Or by clicking on the up or down arrows.
You can also click on the three dots next to each header and you will get the following menu, where you can choose to move the current column to the top or to the bottom of the columns list.

Click on done and you will get the new tabular view according to your input, you will have the columns you selected with the same order you chose.
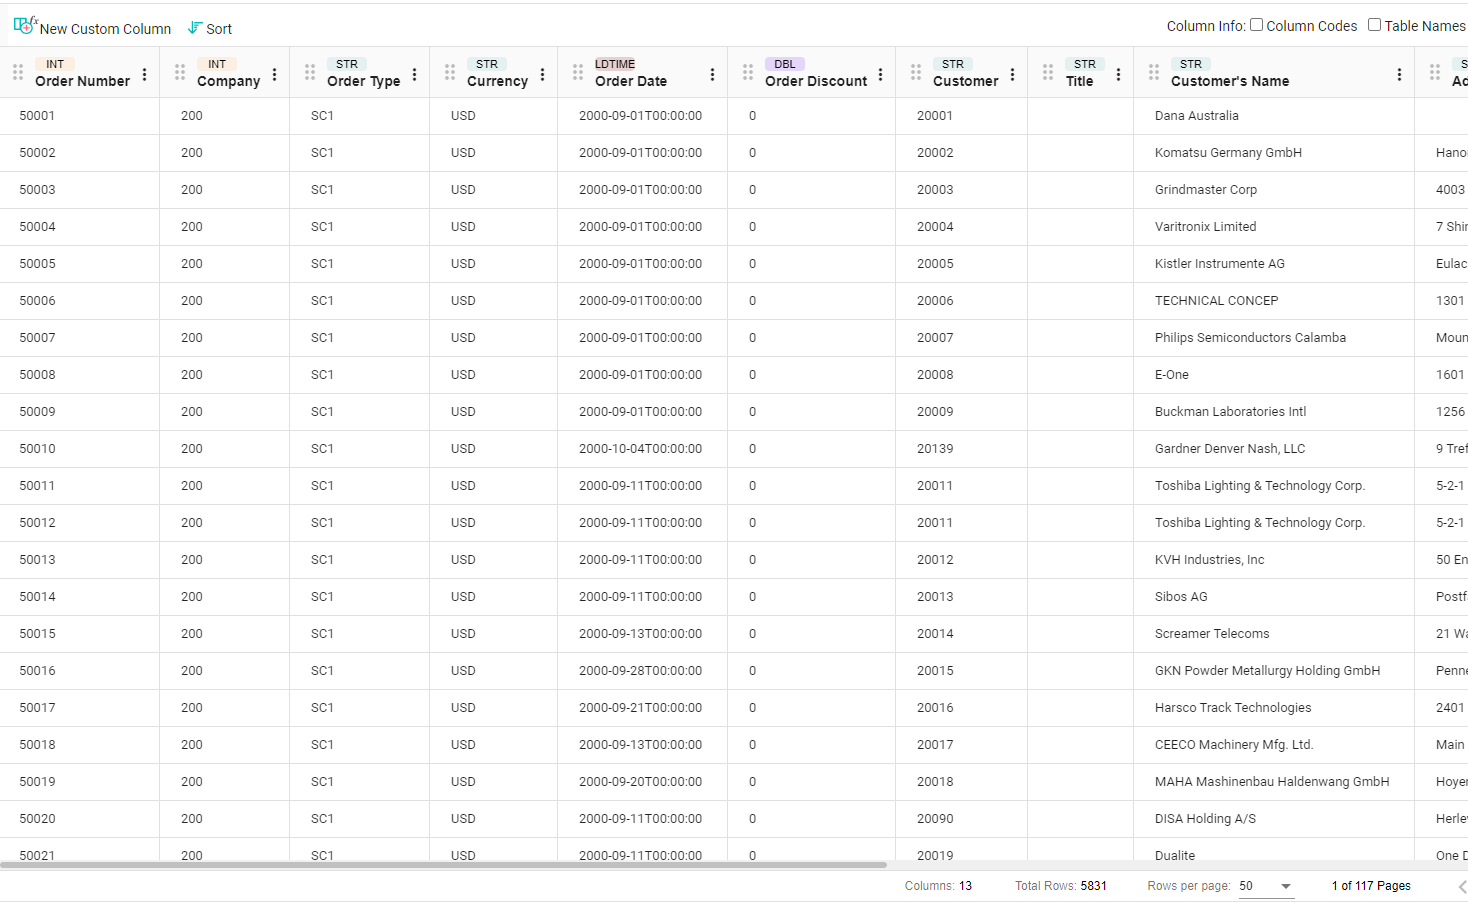
Now that you have your table, you can perform multiple actions to get the desired output.
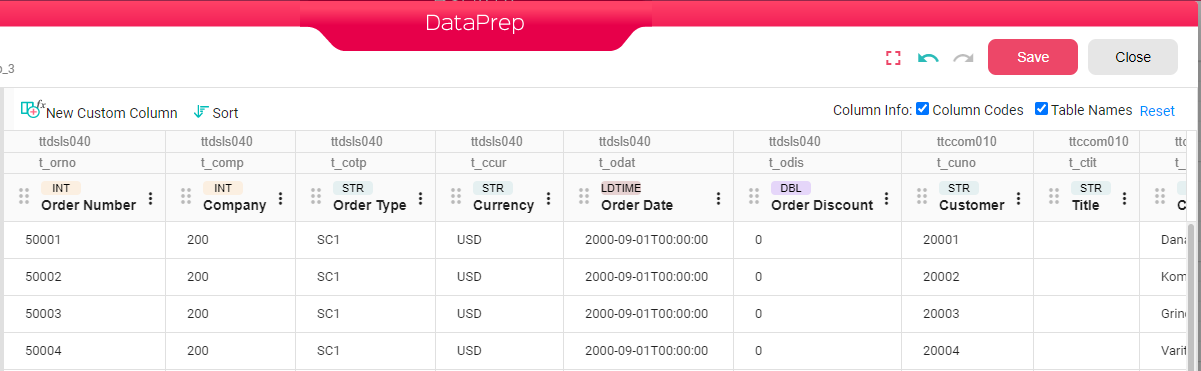
Column Info
You have the option to add more column info on your table columns if needed.
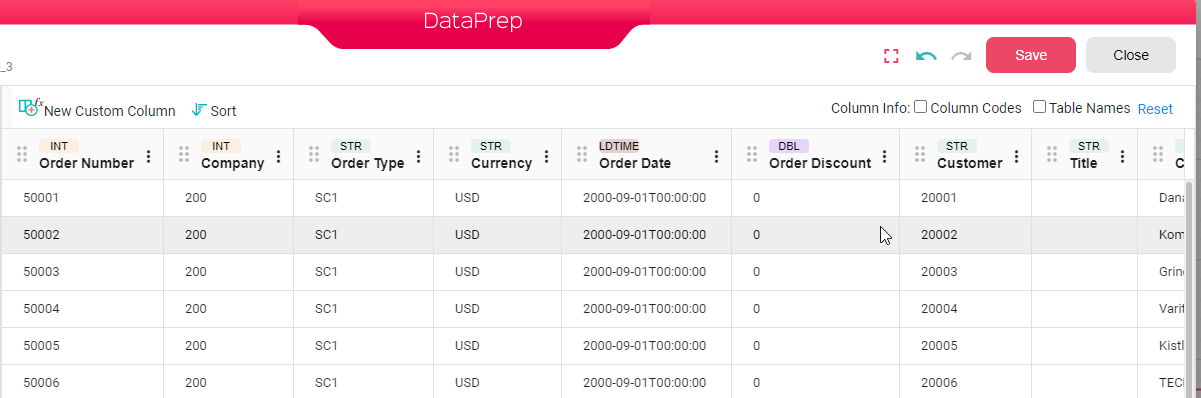
The column info options are on the top right side of the DataPrep.
You can select to show the
- Columns Codes: this is the unique code for each column,used in custom columns and may be used later in other nodes to distinguish each field from the other.
- Table Names - In case the field source is a query then this is the field’s table name.
Reset
On the top right corner you have the Reset button where you can reset all your settings and start all over again.
Adding Columns
There is more than one way to add new columns to the table.
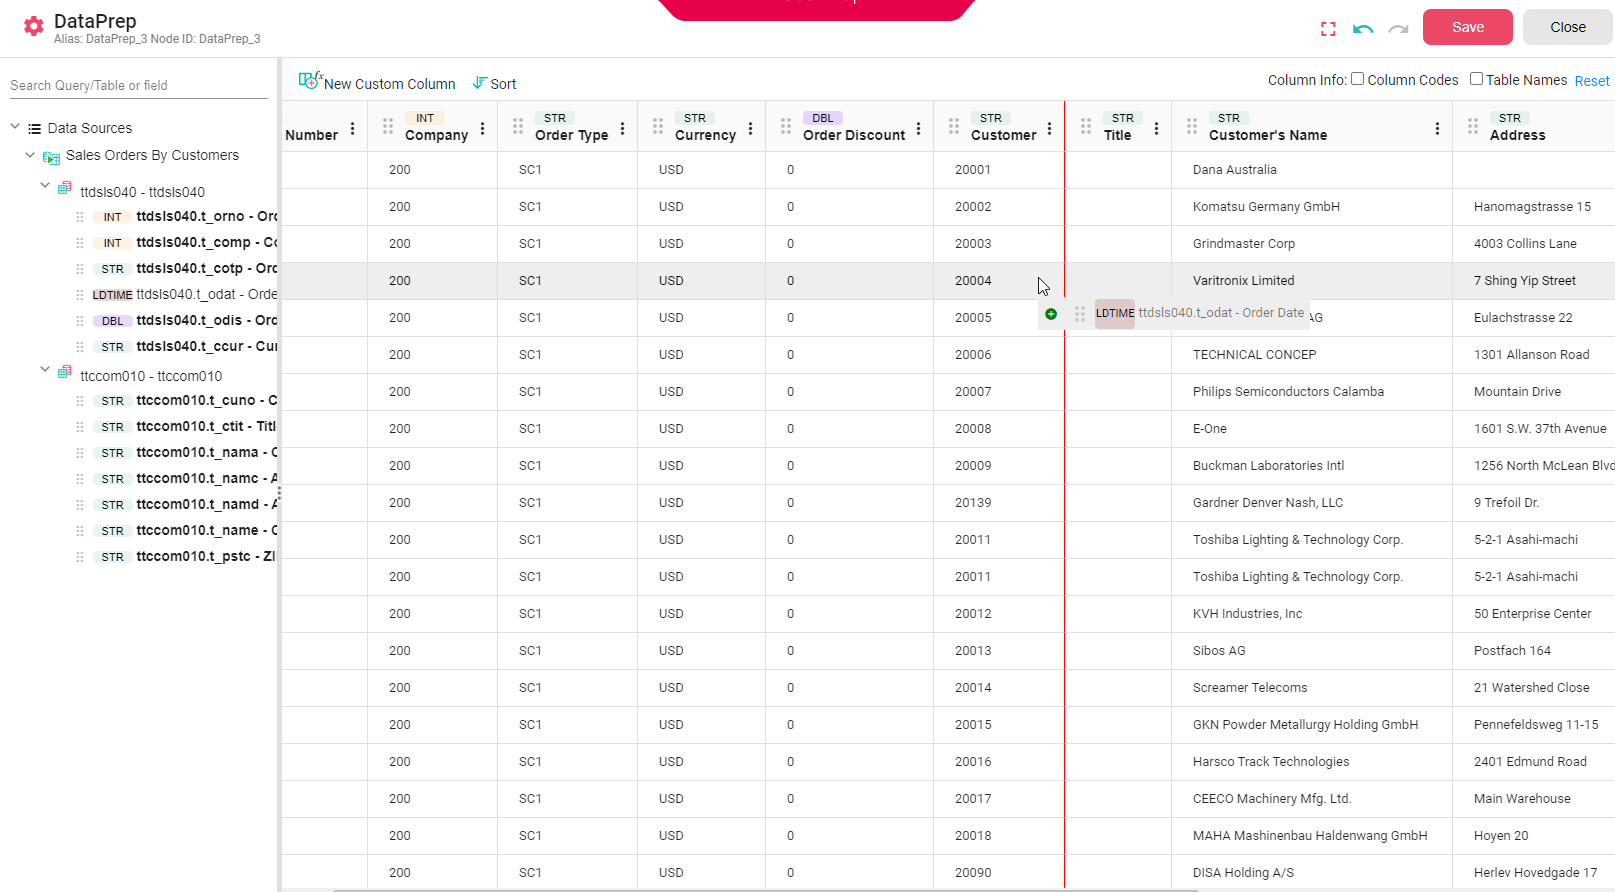
You can add a new column to the table by dragging one field from the list on the left side of the screen to the tabular part. The new column will be added to the right side of the column that the field was dropped on.
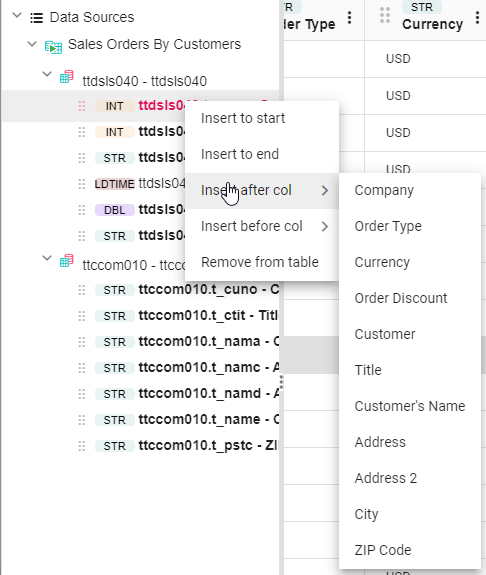
Or you can right click on one field in the list of the left part of DataPrep and choose one of the following options
-
Insert to start
-
Insert to end
-
Insert after col
-
Insert before col
If you choose one of the inserts after col or before col then you will get the list of all columns in the table to select one of them for the insert position. Check the screenshot below.
Several actions can be done on each column. Click on the three dots next to the column header to open the column menu.

In the following we will describe all column menu options
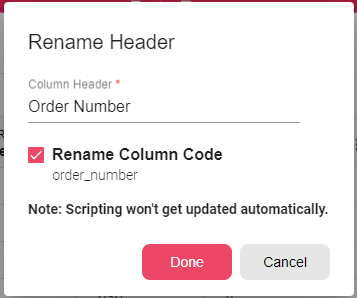
Rename Header
You can rename the column header, and you may choose to rename also the column code.

If you choose to rename the column code you will have to know that no scripting is updated automatically in case this column was used in it.
Split
Using this option, you can split data of type STR in one column into two columns in the table. Click on the column menu and select Split, you can find three types of splitting:

-
By Position Without Cut – Split a column by position into two columns, without removing any data from the columns.
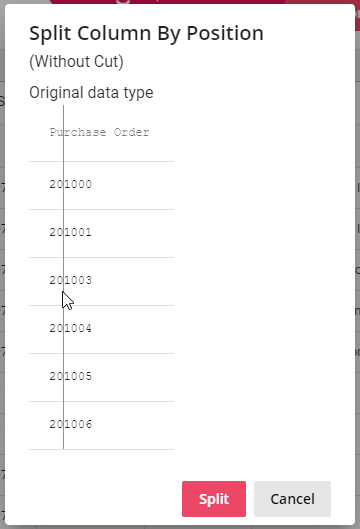
If you pass the mouse cursor on the table you can see a vertical line passing with it, select the place you want to split and click on the mouse left button. If you want to change the split position then all you need to do is to click anywhere on the column with the mouse left button and then the vertical line will start moving again with the mouse cursor on the table and you can choose another position to split. Then when you are satisfied, click on the split button.
-
By Position with Cut – Splits two columns by position while removing the delimiter character.
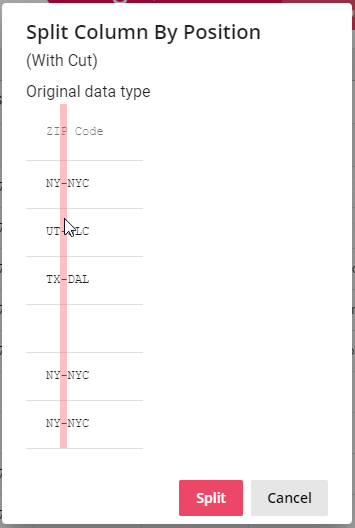
If you pass the mouse cursor on the table you can see a vertical line passing with it, select the character you want to split on and click on the mouse left button. If you want to change the split position then all you need to do is to click anywhere on the column with the mouse left button and then the vertical line will start moving again with the mouse cursor on the table and you can choose another position to split. Then when you are satisfied, click on the split button.
-
By Character – Splits two columns by the first occurrence of a specific character and removes this character.
For example, one column with numbers. You can choose to split it on the decimal separator and then you can choose to delete one column for example and keep just one.
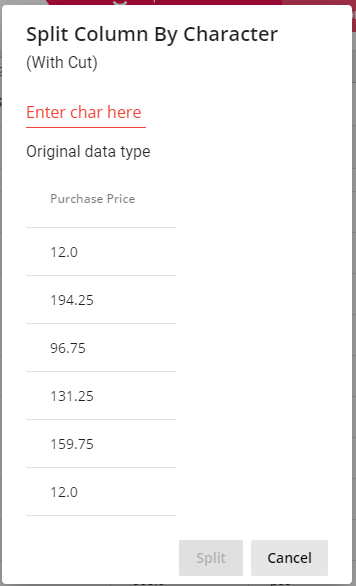
Choosing the “.” to be the splitting character.
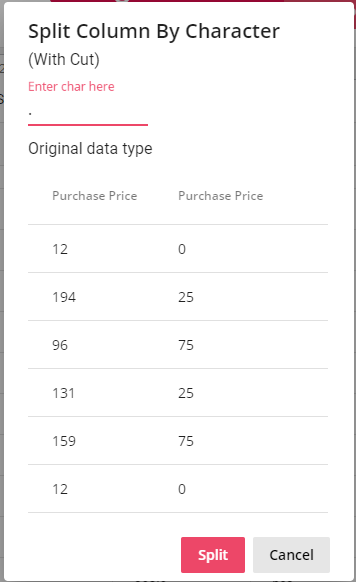
After you split the column into two columns you can select each one of them and rename the column header, split it again or remove one of them.
Remove Leading/Trailing Spaces
Leading and Trailing Spaces are kept by default. For each column of type STR in table, you can choose these options from the column menu:
Remove Trailing Spaces – Spaces after the value will be removed
Remove Leading Spaces – Spaces before the value will be removed
Move Column
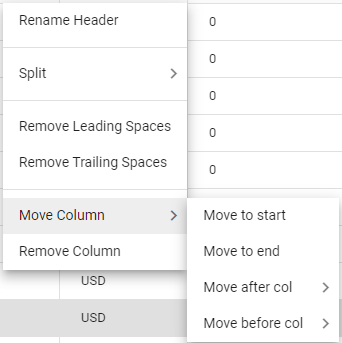
This action has several options to make it easier for the user to change the order of the columns. You can move the column to the beginning or to the end of the table, and you choose to move it before or after certain column that you get to choose from the columns list.
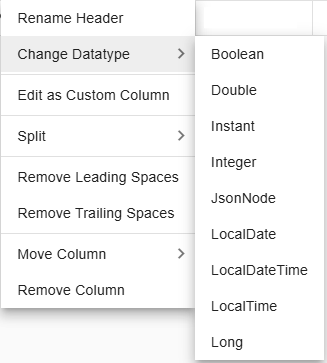
Change DataTypes
Change Datatype allows you to modify the datatype of a specific column by generating a custom column using a script that performs the conversion.

Custom dialogs
When you decide to change a column's data type to something like a `Double` (a number with decimals), or different date/time types (like `Instant`, `LocalDate`, `LocalDateTime`, `LocalTime`), a special pop-up window will appear.
This window helps you:
-
Tell the system how your current data is formatted (e.g., how dates or numbers look).
-
Or, tell the system how you want your new data to look.
This ensures the change happens correctly.
Key Things to Know:
-
Your Column Will Be Replaced: When you change a data type, the original column is removed. A new column is added with the converted data. The new column usually has the original name with `_conv` at the end (e.g., `MyColumn` becomes `MyColumn_conv`).
-
Pop-up Title: The title of the pop-up window will tell you:
- The data type you are changing *from*.
- The data type you are changing *to*.
- The name of the column you are working on.
- Example: "Change String datatype to Double (SalesAmount)"
-
Example Data: The pop-up will show you an example of the data from your column. This helps you pick the right settings for the change.
-
Helpful Messages:
- If you're changing data *TO* a number or a date/time type (e.g., from String to Number, or Sting to Date), the pop-up will say: "Pick the format that best matches your source data".
- If you're changing *FROM* a date/time type to something else (e.g., from Date to Text), it will say: "Pick a format the target data will be converted to".
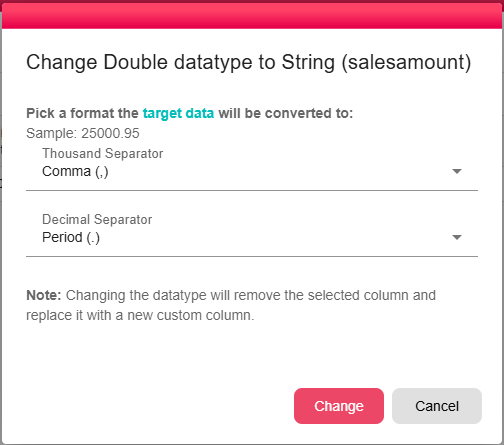
Changing To/From a `Double` (Number with Decimals)
When you change a column to or from a `Double` data type, the "Change Double Datatype" pop-up appears.
-
To help you tell the system how your numbers use symbols for thousands (like the comma in "1,000.00") and for decimals (like the period in "10.50").
Settings in this Pop-up:
-
Thousand Separator:
- What it is: Pick the symbol used to separate thousands in your numbers.
- Choices: Comma (,), Period (.), Space ( ), or None.
- Usually: Comma (,) is the default.
-
Decimal Separator:
- What it is: Pick the symbol used for the decimal point in your numbers.
- Choices: Comma (,), Period (.), or Space ( ).
- Usually: Period (.) is the default.
- Heads up:
- The Decimal Separator **cannot be the same** as the Thousand Separator. If they are, you'll see an error.
Changing To/From Date/Time Types
When you change a column to or from various date/time types (like `Instant`, `LocalDate`, `LocalDateTime`, `LocalTime`), the "Change DateTime Datatype" pop-up appears.
-
To let you specify the exact style or pattern of your date/time text, or how you want it to look after changing.
Settings in this Pop-up:
-
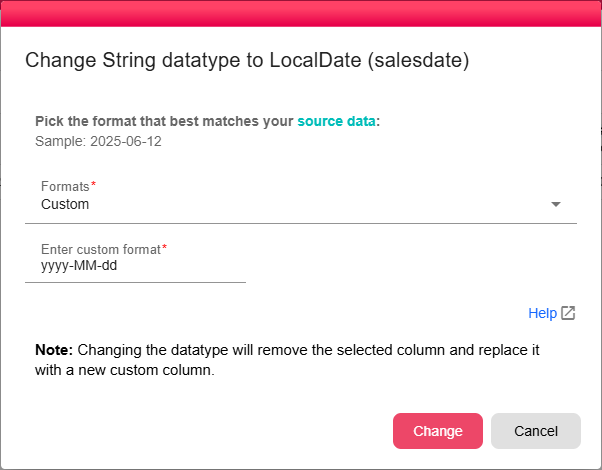
Formats:
- What it is: Choose a date/time style from a list that matches your data, or pick "Custom" to type your own.
- Choices:
- A list of common date/time styles. Each style shows the pattern (e.g., `yyyy-MM-dd HH:mm:ss`) and an example (e.g., 2023-10-26 14:30:00).
- `Custom`: Choose this if your date/time style isn't in the list.
- Important: You must pick a style or choose "Custom" and type one in. If not, you'll see an error: "Please select or enter a format."
-
Enter custom format:
- What it is: This box appears only if you selected "Custom" from the "Formats" list above.
- How to use: Type your specific date/time pattern here (e.g., `yyyy-MM-dd'T'HH:mm:ss.SSS'Z'`).
- Important: If you picked "Custom," you must type a format in this box. If it's empty, you'll see an error: "Custom format is required."
-
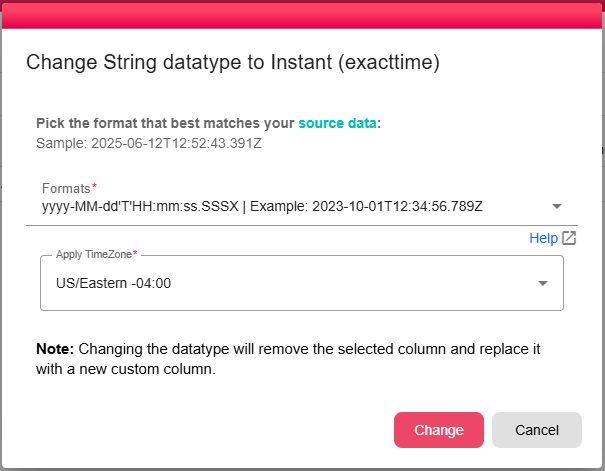
Apply TimeZone:
- What it is: Choose the timezone to use for the conversion. You might not always see this option. It depends on what type of date/time you are changing to (e.g., changing to a simple `LocalDate` might not need a timezone, so this option would be hidden).
- Choices: A dropdown list of timezones (e.g., "UTC +00:00", "America/New_York -04:00").
- Important: If you can see this option and can choose a timezone, you must select one. If not, you'll see an error: "Timezone is required."
-
Help Link (Format Help):
- Where to find it: Look for a "Help" link, usually with an icon that looks like a box with an arrow (open_in_new).
- What it does: Clicking this link opens a new web page. This page explains all the special codes (like `yyyy` for year, `MM` for month, `dd` for day) that you can use to create your own custom date/time formats.
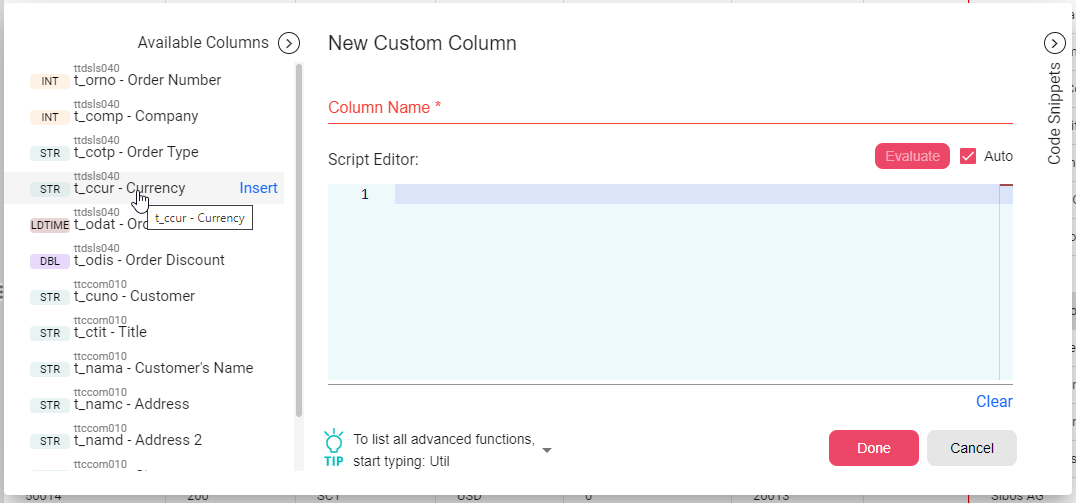
New Custom Column
You can insert additional columns to the table by adding some scripting code using the existing columns in the table and some other properties already passed to this node.
For that you need to click on the New Custom Column button in the toolbar.
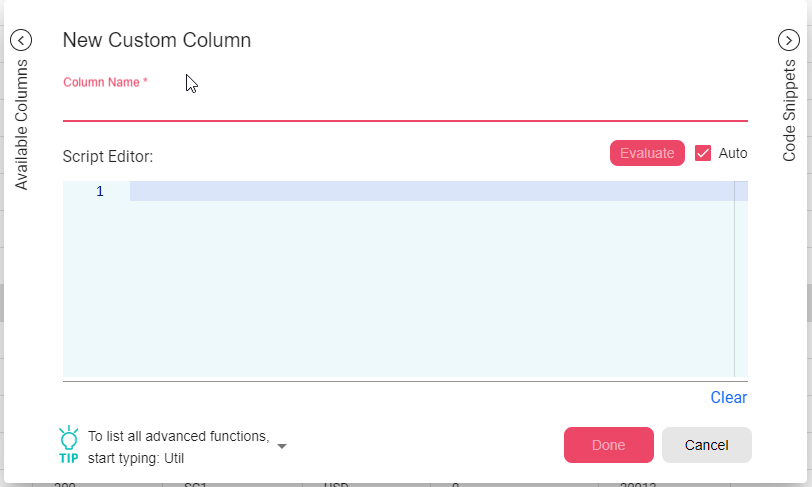
First you need to Insert the new column name. Then you have the Script Editor where you can insert your commands.
Here are some helpful tips for using this editor:
- To get all AutoComplete options click ctrl+space buttons. You will get a list of all columns, properties and advanced functions that could be used.
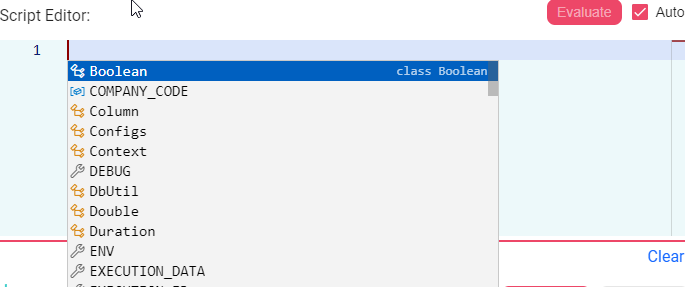
-
Insert Util to get all the advanced functions sorted by groups

-
You have all Available Columns List on the left side of the dialog. When you select one of them you will get an insert button, if you click on it the column code will be added to the Script Editor.
-
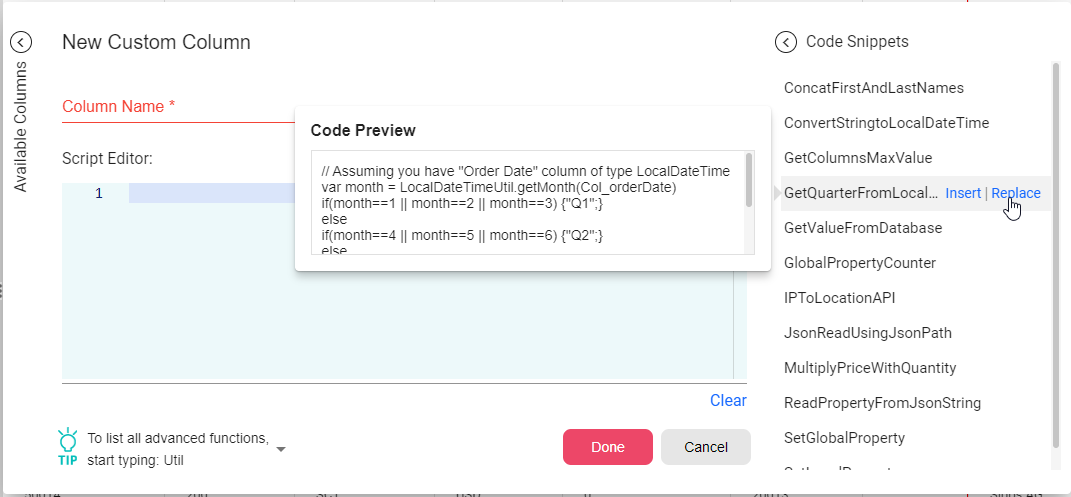
You have some code snippets on the right side of the dialog. You can insert any of them to the Script Editor in order to help you write your own code.
You can read more about scripting and properties in the main Developer Manual.
Sort
You can sort the data in the table by different options. To do so, click on the Sort option in the toolbar.
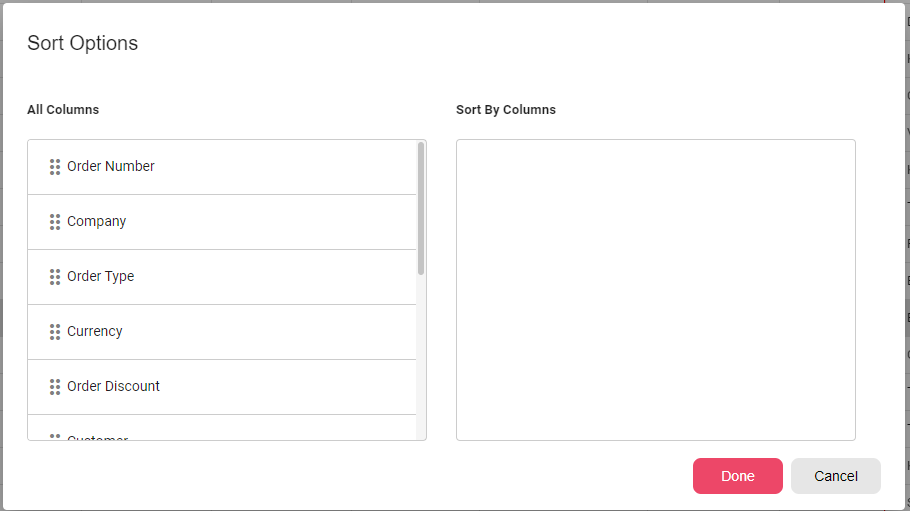
Then you need to drag the columns you need to sort by from the left list to the right one and choose the sorting order for each sort column, ascending or descending. You can sort by maximum of three columns at once.

Enum Options
When the column is for a field of type enum then the developer can choose whether he needs the enum number or the description to appear in the column data.


